Showing posts with label debt free living. Show all posts

Friday, July 15, 2016

Mid-Year Update

The 100% reused outdoor shower/garden!
The last day of June was a rare day.

Hence, the just-as-rare post- ha! Life has been moving along swiftly, tossing a continuous string of challenges and chores our way. My lack of posts is in no way indicative of my level of passion for this way of life. We are on year three of the tiny off-grid life and we have settled into our rhythms nicely. It's to the point where it does not usually occur to us that how we live is any different. Often times, a lively conversation with a new fan of tiny houses gets us to rub our eyes and refocus. After each encounter like that, we find ourselves reveling for a moment in how unique this lifestyle is and how thankful we are that we dove in.

So we are still loving this tiny homestead, but life has a way of pulling you in directions you couldn't possibly plan. I have slowly started to master the one-woman-band that keeps TLB rolling. As a result, just about all my energy and focus has gone into this venture. Not much time to play around at the Pod. :/  I'm quickly outgrowing my current production space, and that's a good problem to have! I've got a couple of different ideas on how to get us to the next level, and I'm excited to share them when I know for sure! 


Back to the last day of June... It was truly a rare day for me. I had an open morning and afternoon before baking that night. I also had an open mind! Lately it seems that my every thought is somehow related to business needs, but on this day, that voice was silent. I had a break from business brain. I stood on the deck, breathing the fresh air, and memorizing details of our lovely view.

Suddenly, inspiration struck and I felt like building. I knew exactly what to work on: outdoor shower 2.0! Some of you may remember the cool, re-claimed shower stall we made with fallen timbers. Well, our timing really sucked. We completed the shower last September and it promptly got cold outside. Through the winter, we looked at it wistfully, all covered in snow. Finally, spring was upon us! Hooray! Showers at the house! Wrong again. It's been an incredibly windy year- which I will come back to- and an especially fierce wind storm in April thrashed the stall to pieces. I was so peeved that I apparently needed a two month time-out before trying again. 


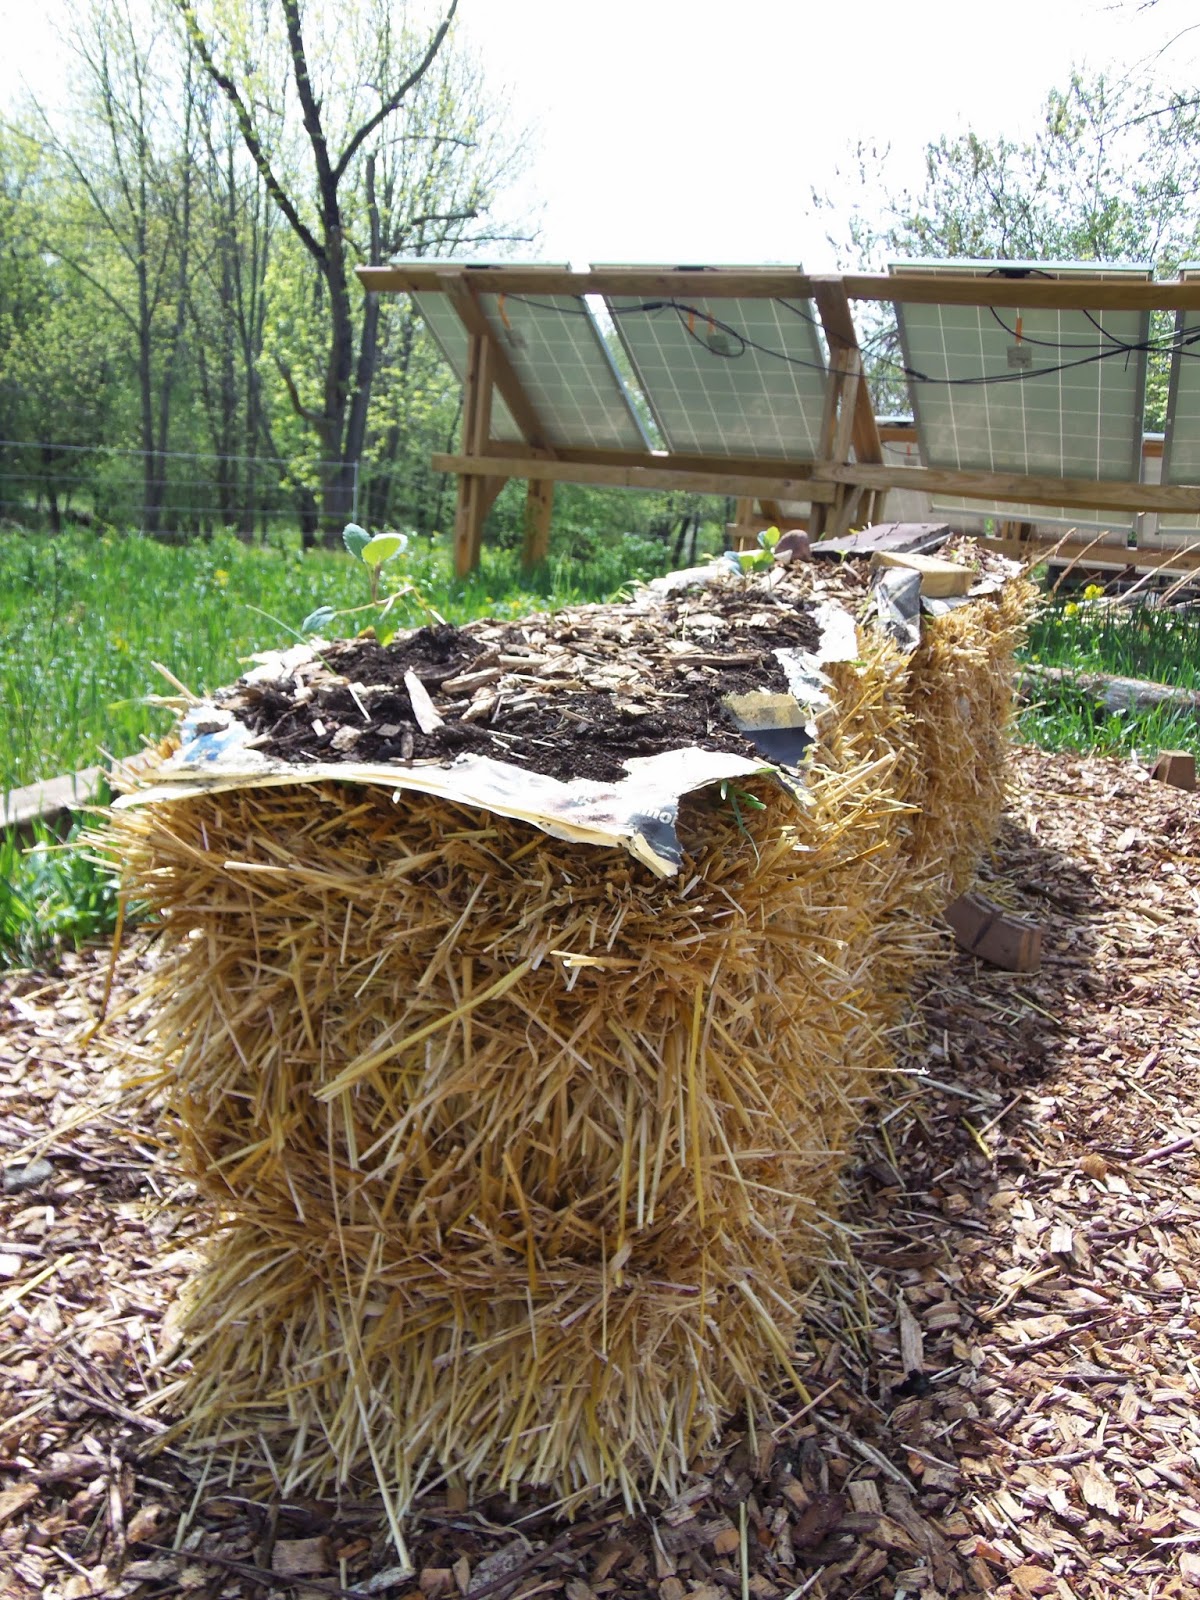
Humungo compost heap, full of freely sprouted veggies!

You're comin' with me, tomato.
I set up some music and got to work. I certainly wasn't about to pay for materials, so I looked around at what I had to work with. I pulled out the hammer and the drill, going about things lazily, as it was a hot sunny day. Using 100% reused or reclaimed materials, and no measuring tape or saw, I put together our new shower stall. 

I didn't plant a garden this spring, which makes me sad. This spurred me to incorporate a living wall to provide privacy....eventually. HA I used our self-watering buckets (also 100% reused) and scouted out some veggies in the farm compost heap. No buying seedlings for this gal! I got three tomatoes, some kind of squash, and a cucumber. It was a bit of a rough transplant, but they all made it, and are growing nicely now. 


Garden just transplanted...looking sad.
After finishing the shower stall, thoroughly burning my back, and soaking in sweat- I took the first, and oh so glorious, shower outdoors. Let me say- it is freakin' great to shower outdoors....at home! Not having to go elsewhere (gym, etc) to shower is quite a treat after that two month time-out. There's just something about bathing in fresh, open air. The other night, I showered under the stars and went to bed feeling more refreshed and more relaxed than I have in months. 


Aside from the outdoor shower, we have been doing little touch ups inside- replacing bunny nibbled trim and refinishing cabinet doors. It's amazing how just a few key details can make the place look super new again. These touch ups were inspired by a very exciting project we will be doing, and I can't wait to share more details! I think you all will be pretty excited! 


Big changes are ahead for these two peas and their pod. It seems like no coincidence that it has been such a windy year already- we are certainly feeling the winds of change swaying our life in new, undreamed of directions. I find myself holding tight to every moment before letting it pass. I understand that change is an inevitable part of life, but it won't stop me from wishing we could stay just like this. 

Thanks for reading!
Like Us On Facebook


Tuesday, September 22, 2015

The 100% Recycled Outdoor Shower - And Other Little Projects

This summer's tiny house projects are meager
compared to the last two years.


But, that is bound to happen as you near the end of that "Must Have" list and start venturing
into the "Nice to Have" list, which seems can always be pushed to a later date. Couple that with a new business and generally active/social lifestyle and you don't see the same kind of pace as in years past. C'est la vie! I have learned to embrace the constant juggling of projects rather than the neat, clean chronological completion that the anal retentive side of me so desperately craves. 


Shower stall wood, ready to go.

Last year we spoke often about getting an outdoor shower together, but we had too many other far more pressing needs. This season we had a little help and inspiration. One thing I didn't mention about our week in VT at the Strawbale workshop with Andrew Morrison was the awesome outdoor shower set up that our hosts, Tyler and Tara, created. I wish I had taken a photo...it was a simple and quick set up. They wrapped tarps around a small circle of trees, filling the ground within that space with small smooth pebbles. A wonderful treat for achey feet! A small cement circle stone stood just below the shower head. A tankless water heater, 20 pound propane tank, huge water tank, and a shower head were all hooked up to provide us bathing capabilities.
Love working with fallen trees!


Let me tell you- after putting in an 8+ hour day of straight busting ass, your body covered in dust and dirt and straw, that shower experience was other worldly. There is just something about being out in the elements as you wash away the grime that brings a level of refreshment unlike any other shower. After that week, Dan and I were determined to get a shower going at home. As with all of our projects lately, we used all recycled and salvaged materials. 

Dan's Dad was doing some work on his store roof, so more free wood was available to us. We picked the best pieces, organized and chopped them into relative lengths and planed them. Some pieces still have remnants of paint, but I plan to paint a funky mural inside the stall, so we didn't spend excessive amounts of time getting the paint off. 


Next, we headed out into the woods and collected several fallen trees. Dan got his first taste of working with a hatchet and how to properly chop wood. I'm always amused in a special kind of way when I teach someone a skill that any kid in the Northern woods learned by the age of 10. I appreciate my upbringing more and more as the years go by. Isn't that always the way?! 

After collecting enough fallen logs, we headed back to the house. We gave each log a clean chop so they would rest flat on the cement. We cleaned out the small section of the dairy barn remains just behind our tiny house. Conveniently, this slab of concrete has a drain right in the middle with a sloping floor.


We held up each small timber and nailed boards one at a time, then we would connect the next timber, then the next set of boards. Given the floor was slanted for drainage, we said to hell with levels and built the stall to work with the floor. This thing isn't meant for a hurricane shelter, just scrubbing stink off.

Next we searched through the old dairy barn and snagged a few pieces of old metal dairy equipment. One slid perfectly into the wall remnants next to our shower and provided exact placement for our solar shower bag. We dug through our scrap pile and created a little raised platform to stand on while showering. 

We both giggled with glee as we used the shower together for the first time, and discovered some of our hilarious design oversights....like the gaps between boards being a little too big....and lining up on all the wrong places of Jess's body. It was too funny to be frustrating. If I stood in the right place, it's like a black bar was placed on all the wrong sections of the body. Good thing I'm not a prude! Flopping my towel over the side of the stall fixed this problem pretty quickly. 


We still need to add some hooks, a shelf or two, and a door, but we have a way to bathe people! Outdoor showers rock! 


Shower stall!

In other news- we also managed to sand and stain all of our recycled pallet siding (the stuff that's on the house anyway) so it's looking WAYYY better and behaves much better when it rains. Before, the pine pieces would swell and at times cause some rubbing on the front door. 


The perfect hanging point for our shower.


Ahhh! All stained and protected! Thank goodness!


We also took our home gym up a notch by installing a hang/pull up bar. Again we used part of a fallen timber and some heavy duty rope. We drilled holes in the loft edge and the bar, simply knotting each end of rope to serve as the stopper. This thing has been a lot of fun since the moment we installed it. We are both considerably stronger even just a month later. I can now do 5 full extension pull ups! Not to mention all of the other gravity resistance moves we can do!

Next up, I will recap the awesome weekend at Deek's Tiny House Summer Camp 3 this past weekend!

Thanks for reading!
Like Us On Facebook


Tuesday, May 26, 2015

A Makeover For The Pod

Weathered gray...not for long!
We've been just as busy as we have been silent! Sorry!

Dan and I have been working like mad on a variety of things- mainly items related to my new business and getting the outdoor area into shape. One of the big undertakings of this spring/summer was to sand and stain the siding. I still pout as I think back to that beautiful blonde smattering of colors. Alas, unprotected wood does not stay so bright. Over the last year, as it sat in the beating sun, the Pod has taken on a gray weathered look. Don't get me wrong, there is a certain charm to weathered gray, but to me, it belongs at the beach- and it certainly isn't the color for us. 


As daunting and tedious as it seemed, this particular project isn't taking nearly as long as we expected. I credit that to having a lot more free time. I can only imagine how long this would have taken, on top of everything else we have accomplished since March, if I was still working 40+ hours a week. Makes me cringe actually. 

Anyways! My arms are getting quite defined and the house is looking fine! Over a few different days we have managed to complete the end wall, utility closet, and about 85% of the front wall. The new stained color looks AMAZING, especially after looking at the ratty old gray for so long. 


We have also been working away at making the space around the Pod more "human putter" friendly. I am not a fan of lots of clothes and footwear. Every summer as a kid- I wore as little as possible. If only I could run around naked like I once did- too bad it's only acceptable until about age 5. Ha!  I prefer to let my skin and feet breathe. So as soon as it gets warm enough, I move to shorts, tanks, and flip flops. That has not been working to my favor here. I already have dealt with poison ivy this year. My butt of all places. I think it happened while I was resting on my heels and my shoes must have had some of the oil. Needless to say I was very aggravated and after a couple days of dealing with an itchy fess, I clothed myself from head to toe, put on rubber gloves and went hunting and yanking. 


I have learned that we do not have "a patch here and a patch over there"...we have poison ivy EVERYWHERE within our area. ALL OF IT. Some places are more dense than others, but I was not happy to discover this fun little fact. Once I had ripped up as much as I could, I started laying cardboard. I want to be able to have a space to walk around and wear my sandals without checking every little step I take. 


I had to lay on the roof to stain the top 2
feet of siding. SO MUCH POLLEN. 

This past weekend, we took advantage of that nice low 60s weather we got and did a bunch of shoveling, hauling, and spreading of chips. Hard work on hots days is the worst! Cooler weather made is somewhat enjoyable! I also weed-wacked. Things are looking much cleaner and sandal friendly now. 


What a contrast eh?!?

The roof containers are exploding, the trellis plants are starting their first little grasps up the vertical surface, and the straw bales....well they are doing alright. They actually require the most attention from me as they need watering and weeding most often. 


Thanks for reading!
Like Us On Facebook


Tuesday, May 12, 2015

Vertical and Stawbale Gardening- Our 100% FREE & RECYCLED Vertical Trellis

Forget flowers! My stair beds have kale and chives!
It feels like quite the juggling act right now, and all I am trying to manage are some slowly growing plants.

The difficulty of a task can rise exponentially if all actions boil down to a handful of pre-requisite decisions you are simply incapable of making. That was me over the last week or so. I have all these ideas and gardening techniques I would like to try and about 25 different types of seeds to choose from, I also had that pile of seedlings I started WAY too soon, just looking like a bunch of gangly trapped teenagers. 

Recycled deck wood!

I'm not used to gardening at a smaller scale I guess. I even restrained myself when planting the seedlings back in March, but still ended up with too many of certain things without any real plan of where to put them. 

The Vertical Trellis

We created a vertical trellis just in front of our house. Partly because of all the great things I read about vertical gardening in this book. I didn't want to give it back to the library! So much knowledge!

Once again, my new mission is to create as much as we need from things that are already laying around or found for free. I'm beginning to re ally love the pile of old deck wood behind Dan's Dad's store. He kept it without really knowing what purpose it may, if ever, serve. It wasn't the pretty pristine looking stuff it used to be, but it was still good solid wood. 


I made my small bed for the trellis out of left over deck wood. We then took apart the two extra solar racking posts we had made last summer. Seeing all of these things lying around here get a second life is giving me a new sense of appreciation for what can happen when you mash together creativity, tenacity, and recycling. We took the longer pieces we retrieved and created a simple frame. This was where we would mount our trellis of sorts.


We thought of a lot of things, maybe bamboo? Maybe thin strips of scrap wood? And at one point, I even thought, "Okay, every other part was free, maybe I'll just grab some lattice at the big store." I went and checked the prices- for the type of weave we would have wanted, it would have run us about $28/sheet and I guessed we would need two. I decided to put a pin in it,  not letting my excitement and OCD level need to just complete it already. 


Just a day later, we were driving home, not even 2 miles from home, and we spotted two pieces of lattice work, propped against a tree with other miscellaneous items. I squealed with joy- what a find! I felt as if I was being rewarded in some way for sticking to my own rule of no spending. We tried every which way to get them in the car, but with screws still poking out, it made it difficult to do without damage. Finally, I said to hell with it- I started walking with them over my head while Dan went and got his truck. 


We brought them home, and used the very screws still in the lattice to attach it all. Free lattice and free hardware! Nice! We have planted peas, beans, peppers, and leeks in this box. Time will tell if I crowded them too much, but if half of it is going to grow upward, I think it will work out great. 


Another major reason for wanting to try vertical gardening and choosing that particular location, was not only to conserve ground space, but to provide some shade to our utility closet. Last summer we did not have our solar power set up, but this year, that cabinet needs to stay as cool as we can manage. Overheating that equipment would be dreadful and oh so costly. 


After a few days of watching the shadows, I was a bit peeved to find that the shadows fell just a few inches short of the utility closet. By the time we scooched the trellis close enough to make proper shade, it would be practically on top of the house and we wouldn't be able to access the closet. SO- our next gardening project is now to set up a few containers on that closet roof and have some sort of lattice or netting reach from there to the top of the trellis. That will do the trick! We are going to have one interesting looking place in another month or so! 

BOOM- Free and Full of Awesome


The Straw Bales

I went to the local hardware/gardening store and picked up 4  bales of hay. I jammed them all into my car which was quite a sight, and quite a mess afterwards. I liked the idea of straw bales because not only do they need minimal to no soil, they can be plopped down anywhere. We have a lot of overgrown, rocky, and root filled soil here, so rather than trying to till or clear away those plants, I opted for bales to sit right on top. Plus, I just want to see how well it all works! 


For a better understanding of how straw bales work and how to prep them, check out this article. We laid down some cardboard (free and abundant at Dan's Dad's store - no purchasing black mesh for us!) watered them well, then covered it with chips. Just a note- always use bare, non-coated cardboard with minimal labels or printing- and be sure to remove all the tape!


 I followed the steps in the article, but things got a little loose towards the end. I was using water directly from the little pond near us, so I think that helped speed up the process. The pond is "live" water packed with nutrients like fish, duck, and turtle poop and teeming with microorganisms that all help set the stage for some great growing medium. Much better than the treated and sanitized water coming from your average garden hose. 

Not very pretty, but the paper will keep
the grass at bay.

Well- all the plants are in, but grass has told me that this stuff is just perfect for it. It's sprouting everywhere. I was quite peeved, as I asked numerous times for the hay with no seed. Either the guy didn't know or didn't care I guess. Make sure you get your bales from a reputable source, or be prepared to battle grass all summer as I will have to do. BLERG. 

In the strawbales, I have some brocolli, leeks, peppers, and dragon carrots. I was going to do some vertical stuff on these beds too, but thought maybe I should give Dan and I a break and focus on just getting our food in the ground.


Aside from the gardening, we have been slowly working on improving the space around us-- well making it less tantalizing to goats would be more accurate. It's beautiful as is! But- the last thing I want is to have a pack of goats munching all of our garden food- so we are trying to make our area look less tempting. How? Wood chips and cardboard. Lots and lots of wood chips and cardboard. Luckily the wood chips were free too! Our landlords were very generous to let us use a bunch. They get it delivered by the truckload from local utility companies that are always looking to get rid of huge piles of the stuff. So, if you have the space to dump it and the interest in using it- contact your local utility company and ask if they need places to get rid of their wood chips it works great as ground cover and mulch. Plus you can't beat free! 

An update on our self-watering containers on the roof- they are doing GREAT! Even in the beating sun, I only have to go up and fill the water reservoirs every 4 days or so. The soil has stayed perfectly moist and the plants are LOVING IT. 

Next up, either sanding and sealing the siding, or starting work on our outdoor shower. We hope to use all the leftover bamboo the goats ate through the winter. Should be fun!

Thanks for reading!
Like Us On Facebook