Tuesday, May 26, 2015

A Makeover For The Pod

Weathered gray...not for long!
We've been just as busy as we have been silent! Sorry!

Dan and I have been working like mad on a variety of things- mainly items related to my new business and getting the outdoor area into shape. One of the big undertakings of this spring/summer was to sand and stain the siding. I still pout as I think back to that beautiful blonde smattering of colors. Alas, unprotected wood does not stay so bright. Over the last year, as it sat in the beating sun, the Pod has taken on a gray weathered look. Don't get me wrong, there is a certain charm to weathered gray, but to me, it belongs at the beach- and it certainly isn't the color for us. 


As daunting and tedious as it seemed, this particular project isn't taking nearly as long as we expected. I credit that to having a lot more free time. I can only imagine how long this would have taken, on top of everything else we have accomplished since March, if I was still working 40+ hours a week. Makes me cringe actually. 

Anyways! My arms are getting quite defined and the house is looking fine! Over a few different days we have managed to complete the end wall, utility closet, and about 85% of the front wall. The new stained color looks AMAZING, especially after looking at the ratty old gray for so long. 


We have also been working away at making the space around the Pod more "human putter" friendly. I am not a fan of lots of clothes and footwear. Every summer as a kid- I wore as little as possible. If only I could run around naked like I once did- too bad it's only acceptable until about age 5. Ha!  I prefer to let my skin and feet breathe. So as soon as it gets warm enough, I move to shorts, tanks, and flip flops. That has not been working to my favor here. I already have dealt with poison ivy this year. My butt of all places. I think it happened while I was resting on my heels and my shoes must have had some of the oil. Needless to say I was very aggravated and after a couple days of dealing with an itchy fess, I clothed myself from head to toe, put on rubber gloves and went hunting and yanking. 


I have learned that we do not have "a patch here and a patch over there"...we have poison ivy EVERYWHERE within our area. ALL OF IT. Some places are more dense than others, but I was not happy to discover this fun little fact. Once I had ripped up as much as I could, I started laying cardboard. I want to be able to have a space to walk around and wear my sandals without checking every little step I take. 


I had to lay on the roof to stain the top 2
feet of siding. SO MUCH POLLEN. 

This past weekend, we took advantage of that nice low 60s weather we got and did a bunch of shoveling, hauling, and spreading of chips. Hard work on hots days is the worst! Cooler weather made is somewhat enjoyable! I also weed-wacked. Things are looking much cleaner and sandal friendly now. 


What a contrast eh?!?

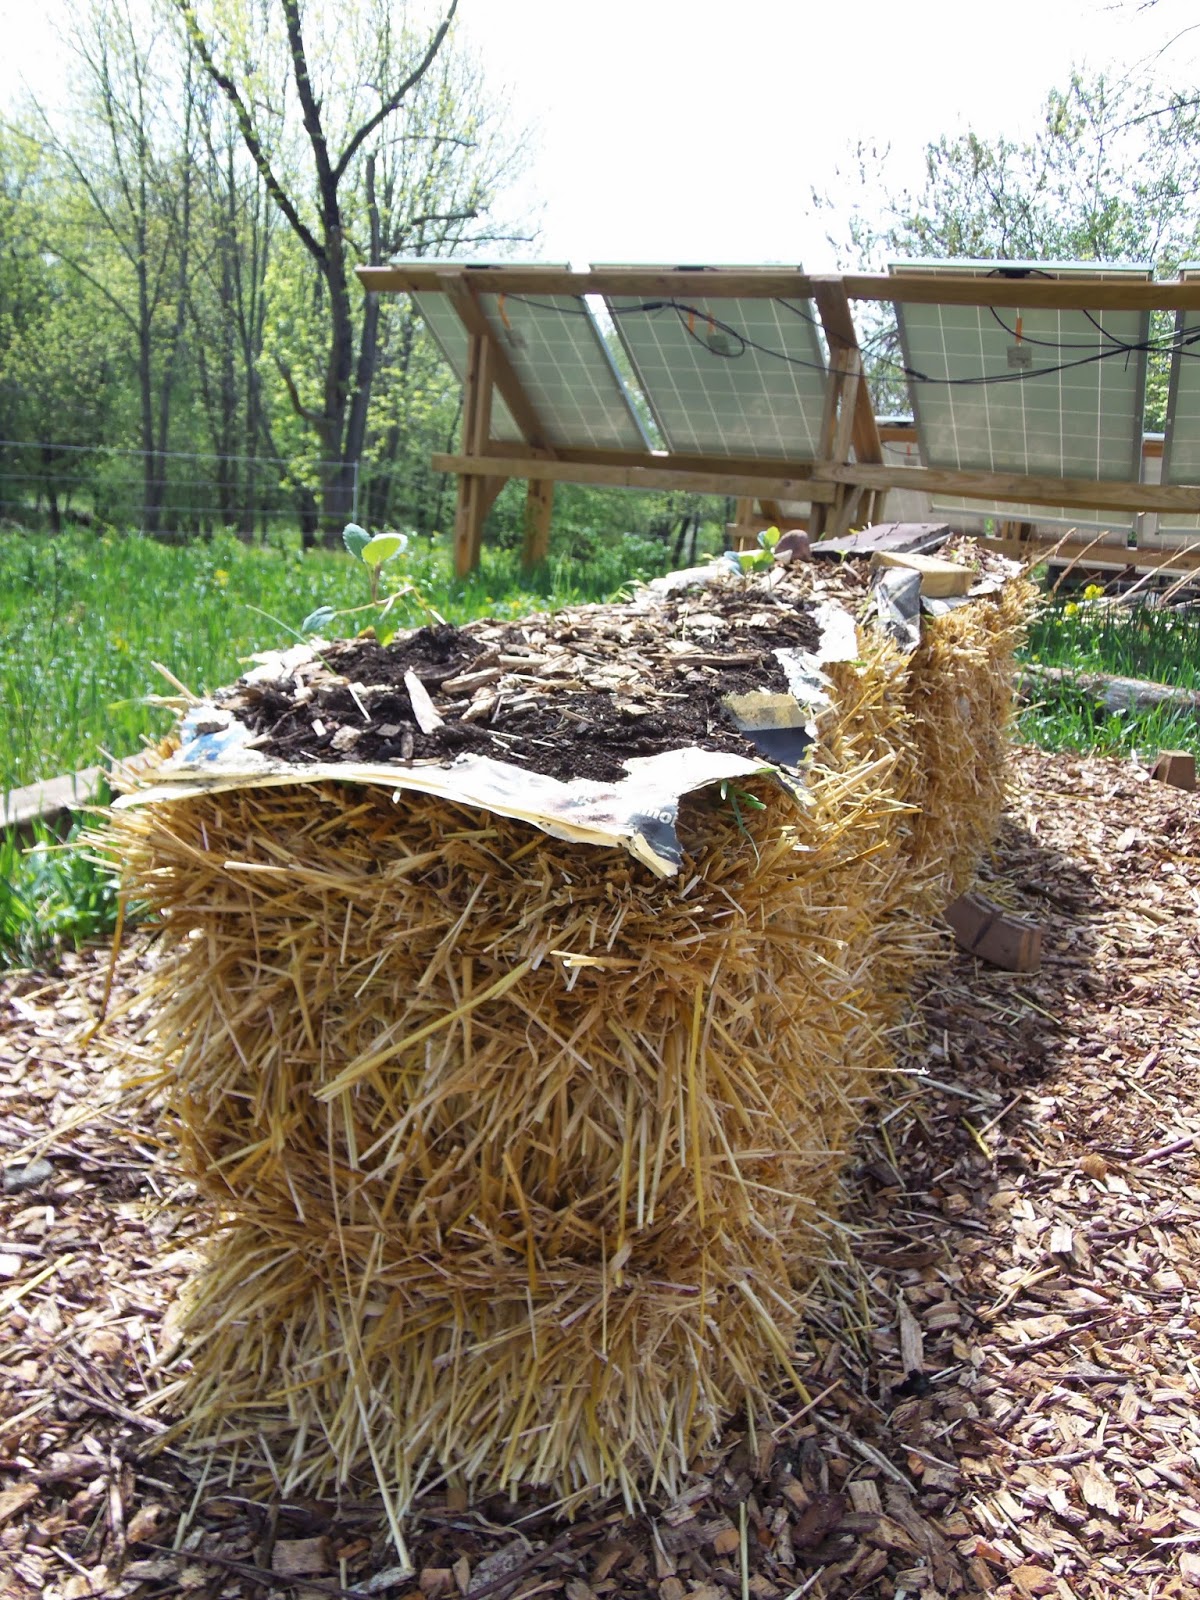
The roof containers are exploding, the trellis plants are starting their first little grasps up the vertical surface, and the straw bales....well they are doing alright. They actually require the most attention from me as they need watering and weeding most often. 


Thanks for reading!
Like Us On Facebook


Tuesday, May 12, 2015

Vertical and Stawbale Gardening- Our 100% FREE & RECYCLED Vertical Trellis

Forget flowers! My stair beds have kale and chives!
It feels like quite the juggling act right now, and all I am trying to manage are some slowly growing plants.

The difficulty of a task can rise exponentially if all actions boil down to a handful of pre-requisite decisions you are simply incapable of making. That was me over the last week or so. I have all these ideas and gardening techniques I would like to try and about 25 different types of seeds to choose from, I also had that pile of seedlings I started WAY too soon, just looking like a bunch of gangly trapped teenagers. 

Recycled deck wood!

I'm not used to gardening at a smaller scale I guess. I even restrained myself when planting the seedlings back in March, but still ended up with too many of certain things without any real plan of where to put them. 

The Vertical Trellis

We created a vertical trellis just in front of our house. Partly because of all the great things I read about vertical gardening in this book. I didn't want to give it back to the library! So much knowledge!

Once again, my new mission is to create as much as we need from things that are already laying around or found for free. I'm beginning to re ally love the pile of old deck wood behind Dan's Dad's store. He kept it without really knowing what purpose it may, if ever, serve. It wasn't the pretty pristine looking stuff it used to be, but it was still good solid wood. 


I made my small bed for the trellis out of left over deck wood. We then took apart the two extra solar racking posts we had made last summer. Seeing all of these things lying around here get a second life is giving me a new sense of appreciation for what can happen when you mash together creativity, tenacity, and recycling. We took the longer pieces we retrieved and created a simple frame. This was where we would mount our trellis of sorts.


We thought of a lot of things, maybe bamboo? Maybe thin strips of scrap wood? And at one point, I even thought, "Okay, every other part was free, maybe I'll just grab some lattice at the big store." I went and checked the prices- for the type of weave we would have wanted, it would have run us about $28/sheet and I guessed we would need two. I decided to put a pin in it,  not letting my excitement and OCD level need to just complete it already. 


Just a day later, we were driving home, not even 2 miles from home, and we spotted two pieces of lattice work, propped against a tree with other miscellaneous items. I squealed with joy- what a find! I felt as if I was being rewarded in some way for sticking to my own rule of no spending. We tried every which way to get them in the car, but with screws still poking out, it made it difficult to do without damage. Finally, I said to hell with it- I started walking with them over my head while Dan went and got his truck. 


We brought them home, and used the very screws still in the lattice to attach it all. Free lattice and free hardware! Nice! We have planted peas, beans, peppers, and leeks in this box. Time will tell if I crowded them too much, but if half of it is going to grow upward, I think it will work out great. 


Another major reason for wanting to try vertical gardening and choosing that particular location, was not only to conserve ground space, but to provide some shade to our utility closet. Last summer we did not have our solar power set up, but this year, that cabinet needs to stay as cool as we can manage. Overheating that equipment would be dreadful and oh so costly. 


After a few days of watching the shadows, I was a bit peeved to find that the shadows fell just a few inches short of the utility closet. By the time we scooched the trellis close enough to make proper shade, it would be practically on top of the house and we wouldn't be able to access the closet. SO- our next gardening project is now to set up a few containers on that closet roof and have some sort of lattice or netting reach from there to the top of the trellis. That will do the trick! We are going to have one interesting looking place in another month or so! 

BOOM- Free and Full of Awesome


The Straw Bales

I went to the local hardware/gardening store and picked up 4  bales of hay. I jammed them all into my car which was quite a sight, and quite a mess afterwards. I liked the idea of straw bales because not only do they need minimal to no soil, they can be plopped down anywhere. We have a lot of overgrown, rocky, and root filled soil here, so rather than trying to till or clear away those plants, I opted for bales to sit right on top. Plus, I just want to see how well it all works! 


For a better understanding of how straw bales work and how to prep them, check out this article. We laid down some cardboard (free and abundant at Dan's Dad's store - no purchasing black mesh for us!) watered them well, then covered it with chips. Just a note- always use bare, non-coated cardboard with minimal labels or printing- and be sure to remove all the tape!


 I followed the steps in the article, but things got a little loose towards the end. I was using water directly from the little pond near us, so I think that helped speed up the process. The pond is "live" water packed with nutrients like fish, duck, and turtle poop and teeming with microorganisms that all help set the stage for some great growing medium. Much better than the treated and sanitized water coming from your average garden hose. 

Not very pretty, but the paper will keep
the grass at bay.

Well- all the plants are in, but grass has told me that this stuff is just perfect for it. It's sprouting everywhere. I was quite peeved, as I asked numerous times for the hay with no seed. Either the guy didn't know or didn't care I guess. Make sure you get your bales from a reputable source, or be prepared to battle grass all summer as I will have to do. BLERG. 

In the strawbales, I have some brocolli, leeks, peppers, and dragon carrots. I was going to do some vertical stuff on these beds too, but thought maybe I should give Dan and I a break and focus on just getting our food in the ground.


Aside from the gardening, we have been slowly working on improving the space around us-- well making it less tantalizing to goats would be more accurate. It's beautiful as is! But- the last thing I want is to have a pack of goats munching all of our garden food- so we are trying to make our area look less tempting. How? Wood chips and cardboard. Lots and lots of wood chips and cardboard. Luckily the wood chips were free too! Our landlords were very generous to let us use a bunch. They get it delivered by the truckload from local utility companies that are always looking to get rid of huge piles of the stuff. So, if you have the space to dump it and the interest in using it- contact your local utility company and ask if they need places to get rid of their wood chips it works great as ground cover and mulch. Plus you can't beat free! 

An update on our self-watering containers on the roof- they are doing GREAT! Even in the beating sun, I only have to go up and fill the water reservoirs every 4 days or so. The soil has stayed perfectly moist and the plants are LOVING IT. 

Next up, either sanding and sealing the siding, or starting work on our outdoor shower. We hope to use all the leftover bamboo the goats ate through the winter. Should be fun!

Thanks for reading!
Like Us On Facebook 


Tuesday, May 5, 2015

GOOD TIMES HAD BY ALL: Deek's Putnam Workshop

This past Saturday, Dan and I had the pleasure of speaking at, and mingling about Deek's tiny house workshop in Putnam, CT. 

We arrived toward the end of the day at the Empty Spaces Project, a cute little art gallery in downtown Putnam. The place was alive, not only with vivid colors (gorgeous art there!), but the energetic bustle of a group raising a small abode right in the center of  gallery's main showroom. Once complete, the tiny house will serve as an art exhibit in and of itself, while also displaying other pieces of art. So cool! 


Image borrowed from Deek's site


Dan was quickly scooped up to help, while I had the pleasure of taking photos of one of the most fun parts- raising the final wall, which had an awesome punk rock inspired mural- painted from corner to corner. 


Later on in the night, after all the banging and drilling was put to rest, everyone scattered to various little taverns and eateries peppered along the downtown area. This part of Putnam has really sprung back to life, and it's bringing a lot of funky, eclectic arts and other businesses back to the area. I always love seeing the revival of a town.


A piece of Deek's art! Love it!
Especially the cell phone 'stache!

After grabbing grub, we all returned to hear a handful of speakers ranging from tiny house dwellers to tiny house dreamers. Dan and I were up first and received a really awesome response to our story. Just minutes before we left for the event, I threw a bunch of photos on my tablet to be able to show. Probably the best move I made all week. It was pretty amazing to see people oooh and ahh at our little house, made by little ol' novice Nellys-- us. 


The other speakers were a delight as well, especially to us! We love hearing about other tiny house dwellers and their story. Ethan came all the way from Vermont to share his house, which is amazing. Miranda of Miranda's Hearth, and Amy Annette Henion (who did an awesome Ted X talk!) were also sharing. Amy provided some great tips and inspiration to fellow dreamers who are pinching pennies and paring down belongings as they dream of a tiny space. 


Miranda shared her engaging vision of a tiny house hotel of sorts, where each house along with every last item in it, would be hand made by a community of artists. Guests could come and enjoy a stay in a tiny house and would be able to purchase any item they saw or used while visiting. She is also going to kick start this vision off by building the very first tiny house right out in public- as an evolving art display. Check out more details here.

Needless to say, we had a wonderful time, made some great connections, and gained a renewed enthusiasm and appreciation for what we have done and encourage others to do as well! 

Thanks for reading!
Like Us On Facebook


Sunday, May 3, 2015

Gardening with Self Watering Containers- 100% recycled, 100% FREE

We have been juggling about fourteen different little gardening or yard related projects over the last couple of weeks.


Rather than try to report progress as it happens on a daily basis (which can be quite chaotic) I will focus on reviewing one project at a time. Today- our self watering containers. As I mentioned in earlier posts, we are experimenting with a few different gardening techniques this season. I will be gardening out of containers, using the vertical gardening concept, and straw bale gardening.

The allure of container gardens (especially when vertical too)- to me- and I think to many tiny house people or renters for that matter-- is that space is completely maximized. I see so many tiny houses tucked neatly into a backyard space with little room for much else. I have also lived in an apartment and experienced the woes of not having a yard of my own at all. But! With container gardens, all you need is space enough for a 5 gallon bucket in a sunny spot, and some simple fencing or lattice for the plant to grow upward. A small balcony, a bay window, or a little walkway area can be turned into a lush and fruitful space. 

Self watering containers are very simple, requiring a couple of five gallon buckets, some pvc piping, rocks, soil, and then a few plants of your choice. Here is an article explaining in more detail. I snagged the image right here from that article as well. 


Once again, I was able to complete this project at no cost to me. We have family and friends in the food prep business (hospital kitchen, a market, a sub shop) and many food items come in 5 gallon buckets before they are further prepped at the location, so they have plenty on a regular basis. 

We collected buckets for free, and also perused behind Dan's Dad's store, where we found several lengths of used PVC pipe that would be perfect. Once the materials were collected it was straightforward work.


We paired up buckets and, using a jig saw, cut holes in the top buckets for the PVC piping. One for the soil "wick" and one for adding more water. We used a drill to add plenty of holes to the bucket and perforate the PVC piping to ensure good water flow. 

As for rocks, I simply walked around the yard and picked up whatever looked good. When it came to soil for the plant, I happened to have a large bin full of the richest soil around. Last fall when we decided to clean up around the cement foundation, we scraped an area clean that used to be an indoor floor. Everything we shoveled off was years and years of leaves, branches, animal droppings, and a lot of other plant matter that had turned to a rich black soil. As we were shoveling it away, I thought to myself, this is nice stuff, let's throw it in that empty bin over there. At the time, I had no idea what I would use it for, but figured it would come in handy for the next season. It sure did!! The only thing I had to buy were my seeds. 


Now, we have four containers that we placed up on the roof to take advantage of a perfectly good growing space and provide organic matter and shade to the roof area, further helping to keep us cool inside. In each bucket I have planted a strawberry (thanks, Adam!) a leek, and a cucumber plant. We will be building some basic lattice for the cucumber to crawl across, that way it won't be laying right on the black rubber of the roof. 


Vining plants work especially great with this container concept. The root system of the plant is the only part that needs soil, and that uses fairly little in comparison to the sprawling greens is produces. If those vines are guided up a lattice or other vertical route, you can pull it quite a bit of produce for very few square feet of your ground space. 


I'm excited to watch our roof get overtaken with the big bright green leaves of cucumber plants! 
Next up, I will be talking about our 100% recycled trellis and garden bed, and also the straw bale gardening.

Thanks for reading!
Like Us On Facebook