 |
| Forget flowers! My stair beds have kale and chives! |
The difficulty of a task can rise exponentially if all actions boil down to a handful of pre-requisite decisions you are simply incapable of making. That was me over the last week or so. I have all these ideas and gardening techniques I would like to try and about 25 different types of seeds to choose from, I also had that pile of seedlings I started WAY too soon, just looking like a bunch of gangly trapped teenagers.
 |
| Recycled deck wood! |
I'm not used to gardening at a smaller scale I guess. I even restrained myself when planting the seedlings back in March, but still ended up with too many of certain things without any real plan of where to put them.
The Vertical Trellis
We created a vertical trellis just in front of our house. Partly because of all the great things I read about vertical gardening in this book. I didn't want to give it back to the library! So much knowledge!


I made my small bed for the trellis out of left over deck wood. We then took apart the two extra solar racking posts we had made last summer. Seeing all of these things lying around here get a second life is giving me a new sense of appreciation for what can happen when you mash together creativity, tenacity, and recycling. We took the longer pieces we retrieved and created a simple frame. This was where we would mount our trellis of sorts.

We thought of a lot of things, maybe bamboo? Maybe thin strips of scrap wood? And at one point, I even thought, "Okay, every other part was free, maybe I'll just grab some lattice at the big store." I went and checked the prices- for the type of weave we would have wanted, it would have run us about $28/sheet and I guessed we would need two. I decided to put a pin in it, not letting my excitement and OCD level need to just complete it already.
 Just a day later, we were driving home, not even 2 miles from home, and we spotted two pieces of lattice work, propped against a tree with other miscellaneous items. I squealed with joy- what a find! I felt as if I was being rewarded in some way for sticking to my own rule of no spending. We tried every which way to get them in the car, but with screws still poking out, it made it difficult to do without damage. Finally, I said to hell with it- I started walking with them over my head while Dan went and got his truck.
 We brought them home, and used the very screws still in the lattice to attach it all. Free lattice and free hardware! Nice! We have planted peas, beans, peppers, and leeks in this box. Time will tell if I crowded them too much, but if half of it is going to grow upward, I think it will work out great.

Another major reason for wanting to try vertical gardening and choosing that particular location, was not only to conserve ground space, but to provide some shade to our utility closet. Last summer we did not have our solar power set up, but this year, that cabinet needs to stay as cool as we can manage. Overheating that equipment would be dreadful and oh so costly.

After a few days of watching the shadows, I was a bit peeved to find that the shadows fell just a few inches short of the utility closet. By the time we scooched the trellis close enough to make proper shade, it would be practically on top of the house and we wouldn't be able to access the closet. SO- our next gardening project is now to set up a few containers on that closet roof and have some sort of lattice or netting reach from there to the top of the trellis. That will do the trick! We are going to have one interesting looking place in another month or so!
 |
| BOOM- Free and Full of Awesome |

I went to the local hardware/gardening store and picked up 4 bales of hay. I jammed them all into my car which was quite a sight, and quite a mess afterwards. I liked the idea of straw bales because not only do they need minimal to no soil, they can be plopped down anywhere. We have a lot of overgrown, rocky, and root filled soil here, so rather than trying to till or clear away those plants, I opted for bales to sit right on top. Plus, I just want to see how well it all works!

For a better understanding of how straw bales work and how to prep them, check out this article. We laid down some cardboard (free and abundant at Dan's Dad's store - no purchasing black mesh for us!) watered them well, then covered it with chips. Just a note- always use bare, non-coated cardboard with minimal labels or printing- and be sure to remove all the tape!
I followed the steps in the article, but things got a little loose towards the end. I was using water directly from the little pond near us, so I think that helped speed up the process. The pond is "live" water packed with nutrients like fish, duck, and turtle poop and teeming with microorganisms that all help set the stage for some great growing medium. Much better than the treated and sanitized water coming from your average garden hose.
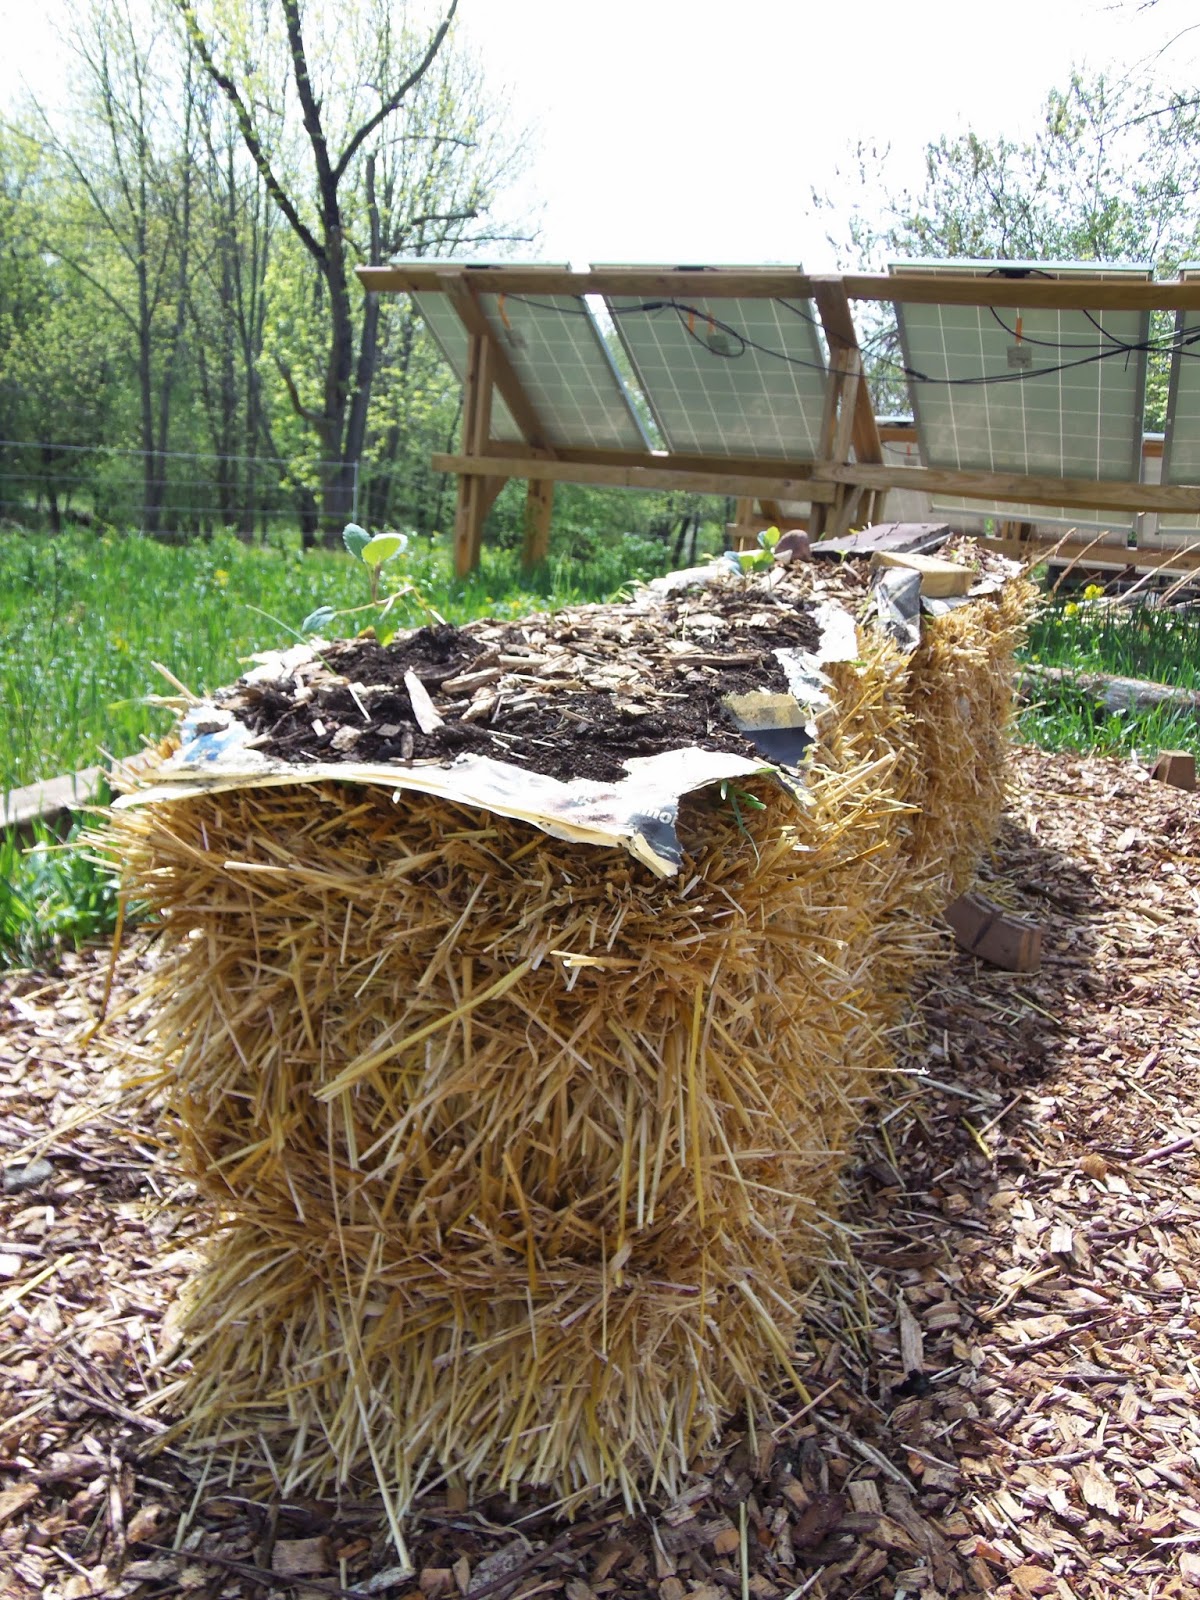 |
| Not very pretty, but the paper will keep the grass at bay. |
Well- all the plants are in, but grass has told me that this stuff is just perfect for it. It's sprouting everywhere. I was quite peeved, as I asked numerous times for the hay with no seed. Either the guy didn't know or didn't care I guess. Make sure you get your bales from a reputable source, or be prepared to battle grass all summer as I will have to do. BLERG.
In the strawbales, I have some brocolli, leeks, peppers, and dragon carrots. I was going to do some vertical stuff on these beds too, but thought maybe I should give Dan and I a break and focus on just getting our food in the ground.

Aside from the gardening, we have been slowly working on improving the space around us-- well making it less tantalizing to goats would be more accurate. It's beautiful as is! But- the last thing I want is to have a pack of goats munching all of our garden food- so we are trying to make our area look less tempting. How? Wood chips and cardboard. Lots and lots of wood chips and cardboard. Luckily the wood chips were free too! Our landlords were very generous to let us use a bunch. They get it delivered by the truckload from local utility companies that are always looking to get rid of huge piles of the stuff. So, if you have the space to dump it and the interest in using it- contact your local utility company and ask if they need places to get rid of their wood chips it works great as ground cover and mulch. Plus you can't beat free!
An update on our self-watering containers on the roof- they are doing GREAT! Even in the beating sun, I only have to go up and fill the water reservoirs every 4 days or so. The soil has stayed perfectly moist and the plants are LOVING IT.
Next up, either sanding and sealing the siding, or starting work on our outdoor shower. We hope to use all the leftover bamboo the goats ate through the winter. Should be fun!
Thanks for reading!
Like Us On Facebook


Very nice. I have heard to ask for "straw" instead of Hay. I used straw and haven't had any issues at all with sprouting. :)
ReplyDeleteYou're doing an amazing job.
ReplyDeleteMel at catesgarden
Thanks so much! The roof top and trellis plants are doing great! The straw bale guys are still moving kind of slow. We shall see...
Delete